The easier way to K8s Operator development using Argo Events
On why you don’t need special operator SDKs to develop K8s Operators

TL;DR (or the “management summary” if you like)
If your organisation uses Kubernetes, chances are that you’re using operators. Once you get to the point that you want to develop your own operators, there comes the choice in how to develop them. Most people go with one of the major operator frameworks, but this isn’t necessarily the right track if you just start out: many frameworks are bulky and hard to set up. What I found out, is that using Argo Events and Argo Workflows, you can
- have fully functional operators using just a handful of files (manifests);
- have your operator without the need for publishing custom-built Docker images;
- have much, much improved inspection into your operators’ handling of resources thanks to the Argo UI.
- develop and test the operator logic in the Argo workflow template independently from the operator itself, using the Argo UI;
- use any programming language you like, not just the ones supported by the “official” frameworks!
However
The example given below is set up as a tutorial. Make sure you don’t simply copy-paste it into production: let your dev team set things up properly and have your infrastructure security advisor go through it. The tutorial below is just for instruction purposes. It is a serious proposal though. You can have fully functional operators without pushing a single Docker image, or without using a single Operator SDK and have a scalable solution. Bear in mind that:
- The setup in this tutorial uses quite a few containers, mostly for debugging. This can be compressed into a single container however, with a bit of refactoring. This, I didn’t put into the tutorial.
- This method isn’t the fastest. It uses an Argo Workflow, which takes a few seconds to instantiate, for each time you create, update or delete a custom resource. For the vast majority of purposes, this is fine. If you really must scale your operator to deploy hundreds of applications per hour, then this method can still work, but it might not be the most efficient solution. Then again, few companies need to build an operator from scratch that needs to scale to this level immediately. For starting out, this method is excellent because it gives you so much more transparency.
- Operator development is never easy. And with this approach, you will probably need to learn quite a bit of Argo domain-specific language. Like most k8s frameworks it’s huge, but it’s useful for learning it in its own right, as Argo is useful for a lot more than Operator development. And: it’s very well documented.
Intro: Kubernetes Operators
In the past few weeks or so, I followed up on an idea I had that had been lingering in my mind for a while. Something that showed particular promise, but I hadn’t found the time to dig into, until now. I had been involved in Kubernetes Operator development for a few months and had the distinct feeling that things could be improved significantly. But before we go into detail, let’s look at operators for a moment. Kubernetes Operators are central to doing anything in Kubernetes. Operators are controllers that make sure that particular kinds of Kubernetes “things”, be it an application or something else, end up the way you specified them to be.
In kubernetes speak: operators are responsible for reconciliation of the desired state with the actual state for a particular custom resource type that extend the Kubenetes API. Kubernetes comes with its own controllers for Deployments, Ingresses, Pods and what have you - these you don’t need to build yourself. But once you want to extend the Kubernetes system with your own types, you get to Operators.
Why Operators exist
In practice it means that an operator is responsible for the life cycle of a resource type of your own design. For example a particular database type, say PostgreSQL, or something else entirely. Of course there already are perfectly fine operators available for PostgreSQL , so you don’t need to design your own. The reason this operator exists, is because deploying a production-grade PostgreSQL database cluster including a backup strategy, is far from trivial and you need many, many manifests to explain to Kubernetes how you want your infrastructure set up. Operators like these help you declare the layout and settings of your PostgreSQL cluster, set up complex infrastructure, taking most cognitive load off your plate. There are operators that deploy applications, manage storage, or even interface with something outside the Kubernetes cluster.
Two articles of vital importance if you really want to sink your teeth in:
- The “Operator pattern” article
- The “CNCF Operator White Paper”. CNCF stands for the “Cloud Native Computing Foundation” and is the main organisation backing the design and development of Kubernetes.
Important to know is that:
- Operators listen to your self-designed “custom resource definitions”, instances of which are “custom resources”, so you can extend the Kubernetes API itself.
- Operators act on create, update and delete events, so they are responsible for the entire life cycle of the resources they create from your custom resource.
- Operators should not do any heavy lifting, as they are expected to easily and stably scale. If any resource-heavy work is involved, this is to be left to other resource definitions, such as Jobs.
- Operators should be highly available: they’re not supposed to drop the ball and should reliably catch each and every event that they should act on.
Your own operator
So, why would you want to develop your own operator? Well, maybe your organisation offers a particular product, let’s say some kind of communications service. Once your organisation chooses to use Kubernetes to deploy this application, you can define your own resource type that describes the deployment of this application. You can define security parameters, the way it is exposed to the outside world, the data storage it uses to persist information, the amount of resources like memory and CPU it is allowed to take up, etcetera.

If your application is relatively simple, you may use Helm so you don’t need a custom resource to describe your application to Kubernetes resources. If you can, you probably should. But if your self-defined application definition requires more complicated logic, Helm is not such a good idea. Trying to put lots of “business logic” inside Helm templates results in very hard to maintain Helm charts with curly braces all over the place. Helm is without a doubt a very useful tool, and it will stay being a very useful tool even when you decide to write your own operator: you can use Helm to deploy the operator! We won’t go into Helm in this tutorial, there are plenty of those around. Instead, we’re going to take a look at when you want to implement your own operator.
Operator development and operator frameworks
The current state of operator development is complex to say the least. The framework we used was the exact opposite of everything you would want from an operator framework. The framework was complex, clunky, buggy, enormous, the operator images we made were huge, the operator itself slow and heavy on resources, and hard to maintain. Which framework we used doesn’t matter here, this is not a framework bashing post. All I will say is that all of the options listed under the operator frameworks to use for operator development are more complex than the one I’m about to show you. Furthermore, all of them suffer from visibility problems that we’ll discuss in some detail below. So, let’s get to it!
Argo Events as an operator framework
For about a year now, I had been using Argo Workflows to much satisfaction. We used it to ingest data from external and internal sources, mostly targeting PostGIS databases to pipe the data to. It has been working very nicely, and we created an operator and accompanying “custom resource definition” that allowed us to describe a dataset ingestion operation, which worked very well for us.
Then, we started looking into Argo Events. It’s a great system for letting other infrastructure components know that some state changes occurred, such as completing the ingestion of a data set. Argo Events has a fantastic set of sources that it can listen to, and if that isn’t enough you can even define your own. Argo Events splits event handling into nicely and cleanly separated parts with each its own responsibilities:
- an EventBus, which will keep event messages until handled,
- an EventSource, which will put a message on an event bus for a particular state change,
- a Sensor, which will listen on the event bus for particular messages and translate these into actions
This system alone is a very nice message bus that you may compare with (but is quite distinct from) products like RabbitMQ (with which I had favourable experience) and Kafka (with which I have no experience). The big difference is that Argo Events is, like all Argo ecosystem products, built to work with Kubernetes. This means that it is probably more “cloud native” than other event handling systems.
One thing that struck me is that EventSources can put a message on the bus on the creation, change or deletion of any resource kind in the cluster. Sounds familiar? It’s exactly the same role as the main responsibility of Operators: to listen to particular custom resources and act on them. So, what if you could use Argo Events to define your Operator, using just that or maybe a few scripts to handle the “business logic” part of the custom resource handling?
It took me a little while to work this out - like any framework on Kubernetes or even Kubernetes itself, it has its own learning curve. But once I saw on how to combine Argo Events and Argo Workflows, it started to dawn on me: this is better than any current special-purpose operator framework and at the same time, it is useful for a lot more as well!
Let’s dig in
So to see this experiment in action, we are going to replicate a tutorial from the Operator SDK and create an operator that handles Memcached deployments. Since I have not used Memcached for anything myself, I can offer little information on its purpose other than that you can use it to take load of your web services by caching http requests, for example. The idea is that, if your http gateway has handled a particular http request, Memcached can keep a copy of the response and serve it much faster because the web service or database the response originated from does not have to go through the operation of assembling the response. This does leave you with the classic hard question on when to invalidate the cache - one of the purportedly “two hard things in Computer Science”.
1. Install Argo Events
The simple solution: follow these steps. To keep things very simple, we’ll go with the cluster-wide installation for now.
NOTE: make sure you only follow the “Cluster-wide Installation” steps, there are three of them. Skip the “Namespace Installation”.
2. Install Argo Workflows
Why do we need Argo Workflows? Because the operator “business logic” is going to be handled in a Workflow. Think of Workflows as much, much better versions of Jobs.
Let’s start with installing Argo server and Workflows cluster-wide:
kubectl create namespace argo
kubectl -n argo apply -k github.com/argoproj/argo-workflows/manifests/cluster-install?ref=master
By default, Argo uses the Docker runtime executor. If you’re on Azure, or you use Podman or some other runtime execution
engine, be sure to patch the Argo Workflow executor:
# Use "pns" executor instead of Docker:
# See https://github.com/argoproj/argo-workflows/issues/826#issuecomment-872426083
kubectl patch -n argo configmap workflow-controller-configmap --patch '{"data":{"containerRuntimeExecutor":"pns"}}'
If your workflow pods fail to start or Argo gives you errors reaching the pods, then switching to a different runtime executor will probably help. Also, for our tutorial we want to disable having to log in to access the Argo UI:
kubectl patch -n argo deployment argo-server --patch \
  '{"spec":{"template":{"spec":{"containers":[{"name":"argo-server","args":["server","--auth-mode=server"]}]}}}}'
Once you have this set up, you can tunnel to the Argo UI using:
kubectl -n argo port-forward svc/argo-server 2746:2746
You can access the UI on https://localhost:2746. The default for the server is to run over
https, so you will get a self-signed certificate warning. As the port-forward option claims the terminal (the tunnel
is active until you disconnect using ctrl-c), you will have to open a new terminal for the commands following down
below.
The most important part here is that the installation comes
with Argo Server, the UI that allows you to inspect both
EventSources, Sensors and, if you generate them from the Sensor triggers, Workflows. Personally, I’d skip the step to
install the argo command line tool, I found it to be of little use. It is, however, very useful in CI test setups,
such as
the one I made for this tutorial
.
3. Install the Memcached custom resource definition
Installing the Argo components can take like a minute to start up. Once it’s up and running, we can start deploying our custom resources. This is not intended to be a full Operator tutorial, so I’ll try to keep things as simple as possible.
---
apiVersion: apiextensions.k8s.io/v1
kind: CustomResourceDefinition
metadata:
  # This must be a combination of the spec.names.plural + spec.group
  name: memcacheds.cache.example.com
spec:
  # This is the api "namespace" you define for yourself.
  # Usually some subdomain of your organisation site url.
  group: cache.example.com
  # This defines the names under which you can list created resources of this kind,
  # using kubectl for example
  names:
    kind: Memcached
    plural: memcacheds
  # Either Namespaced or Cluster-scoped.
  scope: Namespaced
  # `versions` is mandatory:
  # there should be at least one version that is served and stored.
  versions:
    # You usually start out with some kind of alpha version.
    # Be sure to create a roadmap on how to get to a stable "v1".
    - name: v1alpha1
      served: true
      # See also: https://kubernetes.io/docs/tasks/extend-kubernetes/custom-resources/custom-resource-definitions/#create-a-customresourcedefinition
      storage: true
      schema:
        openAPIV3Schema:
          type: object
          properties:
            # Like the `spec` key this key resides under, any custom resource
            # created as kind `Memcached` will need a `spec` key.
            spec:
              type: object
              properties:
                # So the only spec key will be a `size` parameter as integer
                # All tutorial business, of course
                size:
                  type: integer
                  description: The number of replicas for the Memcached deployment
You can simply install this with
kubectl apply -f https://raw.githubusercontent.com/reinvantveer/reinvantveer.github.io/master/_includes/memcached/crd.yaml
4. Create the service account and access rights
By default, the Kubernetes API doesn’t allow access to our newly devised custom resource. By basically anything - we
need to tell the Kubernetes API that it’s OK, provided a special service account is used to access it. Like the custom
resource definition, this is basic Operator engineering 101. This will be our memcached-sa service account, that comes
with the associated rights:
---
# This is just a tutorial setup - adapt
# to your access control requirements
apiVersion: rbac.authorization.k8s.io/v1
metadata:
  name: memcached-role
kind: ClusterRole
rules:
  - verbs:
      - get
      - list
      - create
      - watch
      - patch
      - update
      - post
      - put
      - delete
    resources:
      - memcacheds
      - workflows
      - workflowtemplates
      - deployments
      - pods
      - pods/log
      - pods/exec
    apiGroups:
      - cache.example.com
      - argoproj.io
      - apps
      # Core API group: for pods
      - ""
---
apiVersion: rbac.authorization.k8s.io/v1
kind: ClusterRoleBinding
metadata:
  name: memcached-rb
roleRef:
  name: memcached-role
  apiGroup: rbac.authorization.k8s.io
  kind: ClusterRole
subjects:
  - kind: ServiceAccount
    name: memcached-sa
    # In case you installed Argo Events in a different namespace:
    # adapt namespace here
    namespace: argo-events
---
apiVersion: v1
kind: ServiceAccount
metadata:
  name: memcached-sa
  namespace: argo-events
Install with:
kubectl apply -n argo-events -f https://raw.githubusercontent.com/reinvantveer/reinvantveer.github.io/master/_includes/memcached/rbac.yaml
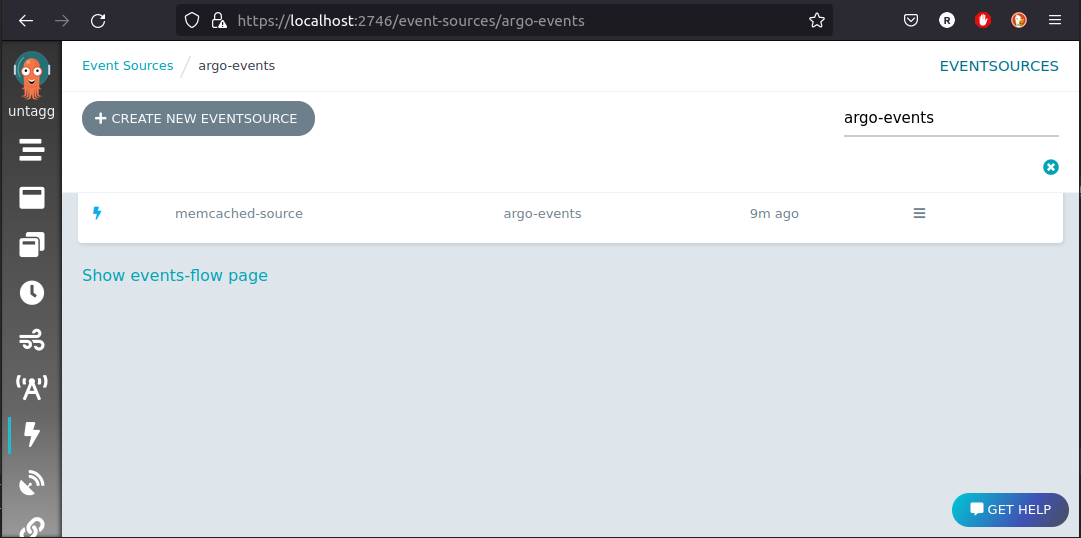
4. Install the EventSource
The EventSource specifies what to listen to - in this case our custom “Memcached” resources. We specify that we listen
to all life cycle events. In event-speak, these are ADD, UPDATE and DELETE.
---
apiVersion: argoproj.io/v1alpha1
kind: EventSource
metadata:
  name: memcached-source
spec:
  template:
    # Assign a service account with `get`, `list` and `watch` permissions
    # on the resource being listened to.
    serviceAccountName: memcached-sa
  resource:
    memcached:
      group: cache.example.com
      version: v1alpha1
      resource: memcacheds
      eventTypes:
        # Types: https://github.com/argoproj/argo-events/blob/00e2ae801addcd362a22613a745ae424932efa40/pkg/apis/eventsource/v1alpha1/types.go#L280
        # Listen to all lifecycle events of the specified custom resource
        - ADD
        - UPDATE
        - DELETE
      filter:
        afterStart: true
You can install this with
kubectl -n argo-events apply -f https://raw.githubusercontent.com/reinvantveer/reinvantveer.github.io/master/_includes/memcached/event-source.yaml
And we can see it appearing in the UI:
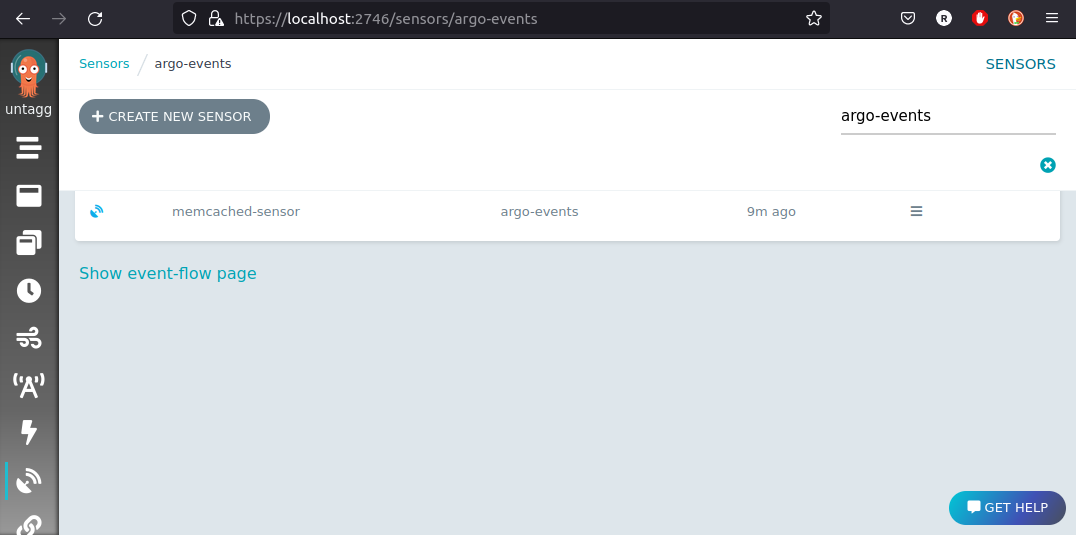
5. Install the Sensor
The sensor specifies what to do with the event messages generated by our EventSource. In our case, we offload the work
to an Argo Workflow that calls a WorkflowTemplate (see below) with a few parameters from the event message:
---
apiVersion: argoproj.io/v1alpha1
kind: Sensor
metadata:
  name: memcached-sensor
spec:
  template:
    serviceAccountName: memcached-sa
  dependencies:
    - name: source-dependency
      # References the metadata.name in the event source
      eventSourceName: memcached-source
      # References the key directly under "resource:" in the event source
      eventName: memcached
  triggers:
    - template:
        name: argo-workflow-trigger
        argoWorkflow:
          operation: submit
          source:
            resource:
              apiVersion: argoproj.io/v1alpha1
              kind: Workflow
              metadata:
                generateName: deploy-memcached-workflow-
              spec:
                serviceAccountName: memcached-sa
                entrypoint: deploy-memcached-template
                arguments:
                  parameters:
                    # These values get overridden, see `parameters` below
                    - name: memcached-manifest
                      value: ""
                    - name: operation
                      value: ""
                    # These values are required for the Sensor to deploy
                    - name: script
                      valueFrom:
                        configMapKeyRef:
                          name: memcached-cm
                          key: main.py
                    - name: deployment-manifest
                      valueFrom:
                        configMapKeyRef:
                          name: memcached-cm
                          key: deployment-manifest
                templates:
                  - name: deploy-memcached-template
                    steps:
                      # `steps` may look a little funky, as lists of lists:
                      # the outer lists are run sequentially, the inner ones
                      # in parallel
                      - - name: call-template
                          # We call the template reference listed under `name`,
                          # from the template onwards listed under `template`
                          templateRef:
                            name: memcached-deploy-workflow-template
                            template: main

          # These are the parameters of what data gets selected from the event bus
          # message into the resource generated by the sensor
          parameters:
            - src:
                dependencyName: source-dependency
                # The message body is the Memcached custom resource
                dataKey: body
              dest: spec.arguments.parameters.0.value
            - src:
                dependencyName: source-dependency
                # This is the `operation` parameter to the workflow,
                # one of ADD, UPDATE, or DELETE, covering the entire life cycle
                dataKey: type
              dest: spec.arguments.parameters.1.value
You can install this with
kubectl apply -n argo-events -f https://raw.githubusercontent.com/reinvantveer/reinvantveer.github.io/master/_includes/memcached/sensor.yaml
And it appears in the UI:
6. Install the configmap containing the operator implementation details
Instead of putting all implementation details for the operator into the Workflow or Workflow Template (see next step), we use a common practice in Kubernetes: a ConfigMap. ConfigMaps hold configuration, in our case the script we use to configure the Memcached deployment and the deployment template for our Memcached deployment.
The main reason why this is a good idea is that operators tend to grow in complexity and with it the lines of code required to configure the target resources to apply to the cluster. Putting all this into the WorkflowTemplate will result in larger and larger WorkflowTemplates that become harder to maintain. With ConfigMaps we can “modularize” our operator logic into separate files that are stored in separate ConfigMap keys or even into separate ConfigMaps if we like:
---
apiVersion: v1
kind: ConfigMap
metadata:
  name: memcached-cm
  labels:
    # Note that this label is required for the informer to detect this ConfigMap.
    # See also: https://github.com/argoproj/argo-workflows/blob/master/examples/configmaps/simple-parameters-configmap.yaml
    # https://github.com/argoproj/argo-workflows/blob/master/examples/arguments-parameters-from-configmap.yaml
    workflows.argoproj.io/configmap-type: Parameter
data:
  main.py: |
    import argparse
    import json

    parser = argparse.ArgumentParser(description='Memcached to deployment')
    parser.add_argument('--memcached-manifest', required=True)
    parser.add_argument('--deployment-manifest', required=True)
    args = parser.parse_args()

    memcached = json.loads(args.memcached_manifest)
    deployment = json.loads(args.deployment_manifest)

    deployment['metadata']['namespace'] = memcached['metadata']['namespace']
    deployment['spec']['replicas'] = int(memcached['spec']['size'])
    result = json.dumps(deployment, indent=2)

    # Printed output goes into outputs.parameters.result
    with open('/output-manifest.json', 'wt') as f:
      f.write(result)

  # Storing the manifest in JSON allows us to use the Python standard library
  deployment-manifest: |
    {
      "apiVersion": "apps/v1",
      "kind": "Deployment",
      "metadata": {
        "name": "memcached-deployment",
        "labels": {"app": "memcached"}
      },
      "spec": {
        "replicas": 1,
        "selector": {"matchLabels": {"app": "memcached"}},
        "template": {
          "metadata": {"labels": {"app": "memcached"}},
          "spec": {
            "containers": [{
              "name": "memcached",
              "command": ["memcached", "-m=64", "-o", "modern", "-v"],
              "image": "docker.io/memcached:1.4.36-alpine",
              "ports": [{"containerPort": 11211}]
            }]
          }
        }
      }
    }
As you can see, this ConfigMap also holds the “template” we use for our Memcached deployment. Instead of YAML, we express this manifest in JSON because this is much easier to load. Many programming languages come with a JSON parser in the standard library (think Python, JavaScript, Ruby, Go, PHP, etc), but I know of not a single language with a YAML parser in the standard lib. Since any JSON is valid YAML, we can pass the result as JSON and be a valid output manifest.
Install with
kubectl apply -n argo-events -f https://raw.githubusercontent.com/reinvantveer/reinvantveer.github.io/master/_includes/memcached/configmap.yaml
7. Install the workflow template to deploy Memcached resources
Finally, we’re deploying the Argo WorkflowTemplate that takes care of the deployment for us - the “heavy lifting” that
the Sensor delegated to the Workflow:
---
#  The workflow template that does the "heavy lifting"
apiVersion: argoproj.io/v1alpha1
kind: WorkflowTemplate
metadata:
  name: memcached-deploy-workflow-template
spec:
  # See the `main` template below: this gets executed
  entrypoint: main
  # Use the service account with sufficient rights to deploy
  serviceAccountName: memcached-sa
  ttlStrategy:
    secondsAfterCompletion: 300
  # Garbage collection settings for clearing up old pods
  podGC:
    strategy: OnPodSuccess

  # Global Workflow parameters, passed/overridden from the Sensor
  arguments:
    parameters:
      # Injected by Sensor workflow
      - name: memcached-manifest
        # Sets a compact default which we can test-run in Argo UI
        default: |
          { "apiVersion": "cache.example.com/v1alpha1", "kind": "Memcached",
            "metadata": { "name": "memcached", "namespace": "argo-events" },
            "spec": { "size": "3" } }
      # Injected by Sensor workflow
      - name: operation
        default: ADD
      - name: script
        valueFrom:
          configMapKeyRef:
            name: memcached-cm
            key: main.py
      - name: deployment-manifest
        valueFrom:
          configMapKeyRef:
            name: memcached-cm
            key: deployment-manifest

  templates:
    # A simple logging container template - we'll use this to debug
    - name: log
      inputs:
        parameters:
          - name: content
      container:
        name: simple-logger
        image: ubuntu:latest
        command:
          - echo
        args:
          - "{{inputs.parameters.content}}"

    # The actual "business logic" for our operator.
    # As tutorials go, it's a bit contrived - there's very little
    # action going on
    - name: operator-logic
      container:
        name: python-operator-logic
        image: python:3.10-slim
        command:
          - python3
          - -c
          - "{{workflow.parameters.script}}"
          - --deployment-manifest={{workflow.parameters.deployment-manifest}}
          - --memcached-manifest={{workflow.parameters.memcached-manifest}}
      outputs:
        parameters:
          - name: result
            valueFrom:
              path: /output-manifest.json

    - name: operation-mapping
      script:
        image: python:3.10-slim
        command:
          - python3
        # The "operations" from our event source differ from the ones used in the
        # deployment syntax - we need to map from one to the other
        source: |
          mapping = {
            "ADD": "apply",
            "UPDATE": "apply",
            "DELETE": "delete",
          }
          print(mapping["{{workflow.parameters.operation}}"])

    - name: deploy
      inputs:
        parameters:
          - name: action
          - name: manifest
      resource:
        action: "{{inputs.parameters.action}}"
        manifest: "{{inputs.parameters.manifest}}"

    # This is the actual entrypoint for our workflow
    # It takes care of the execution flow
    - name: main
      steps:
        - - name: log-memcached-manifest
            # Uses the "log" template
            template: log
            arguments:
              parameters:
                - name: content
                  value: "{{workflow.parameters.memcached-manifest}}"

        - - name: log-operation
            # Again: uses the "log" template below, so we only need to define once
            template: log
            arguments:
              parameters:
                - name: content
                  value: "{{workflow.parameters.operation}}"

        - - name: parameterize-replicas
            template: operator-logic

        - - name: log-result
            template: log
            arguments:
              parameters:
                - name: content
                  value: "{{steps.parameterize-replicas.outputs.parameters.result}}"

        - - name: map-operation-to-action
            # Calls the actual operator "business logic" part
            template: operation-mapping

        - - name: log-action
            template: log
            arguments:
              parameters:
                - name: content
                  value: "{{steps.map-operation-to-action.outputs.result}}"

        - - name: deploy-memcached
            template: deploy
            arguments:
              parameters:
                - name: action
                  value: "{{steps.map-operation-to-action.outputs.result}}"
                - name: manifest
                  value: "{{steps.parameterize-replicas.outputs.parameters.result}}"
# Done!
Install with
kubectl apply -n argo-events -f https://raw.githubusercontent.com/reinvantveer/reinvantveer.github.io/master/_includes/memcached/workflow-template.yaml
Voilà, the workflow template is present in the Argo UI:
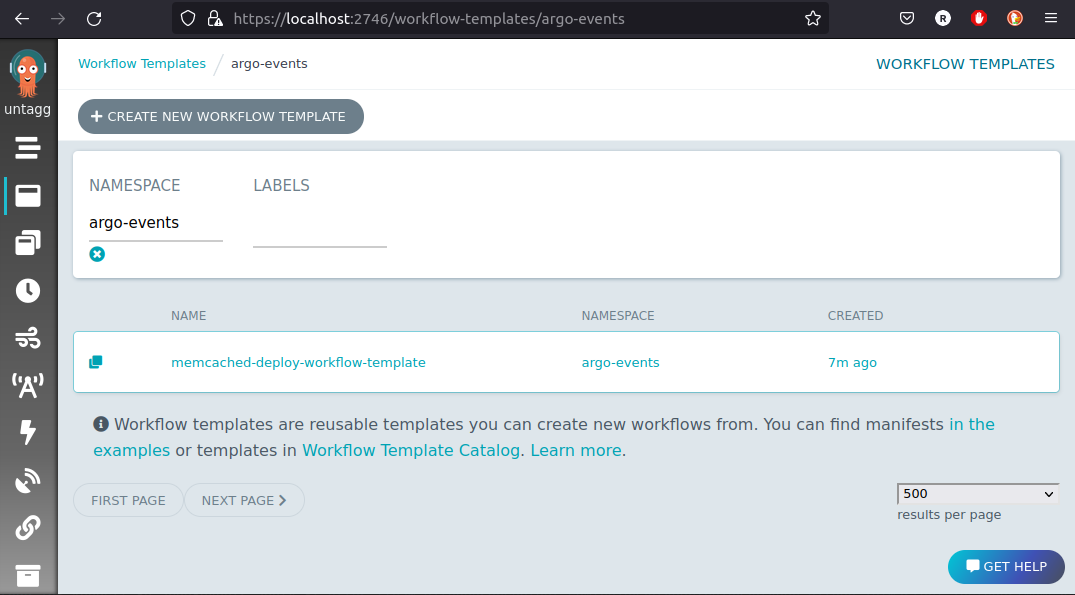
This is a fully functional workflow template. As most workflow templates, we can issue workflows from it, using the Argo UI using the “submit” button. You can test your operator logic in this way. Note that this does not test the correctness of the Sensor, though!
8. Let’s go!
Now we can deploy our Memcached instance:
---
apiVersion: cache.example.com/v1alpha1
kind: Memcached
metadata:
  name: memcached
spec:
  # Let's try it out!
  size: 3
which we should be able to, in good operator-fashion, apply in any namespace we want in our cluster. Let’s say that we want our Memcached deployment to go into the “services” namespace:
# Create fresh namespace
kubectl create namespace services
# This is where we want our Memcached deployment to live:
kubectl apply -n services -f https://raw.githubusercontent.com/reinvantveer/reinvantveer.github.io/master/_includes/memcached/memcached.yaml
And the workflow completes, deploying our application:
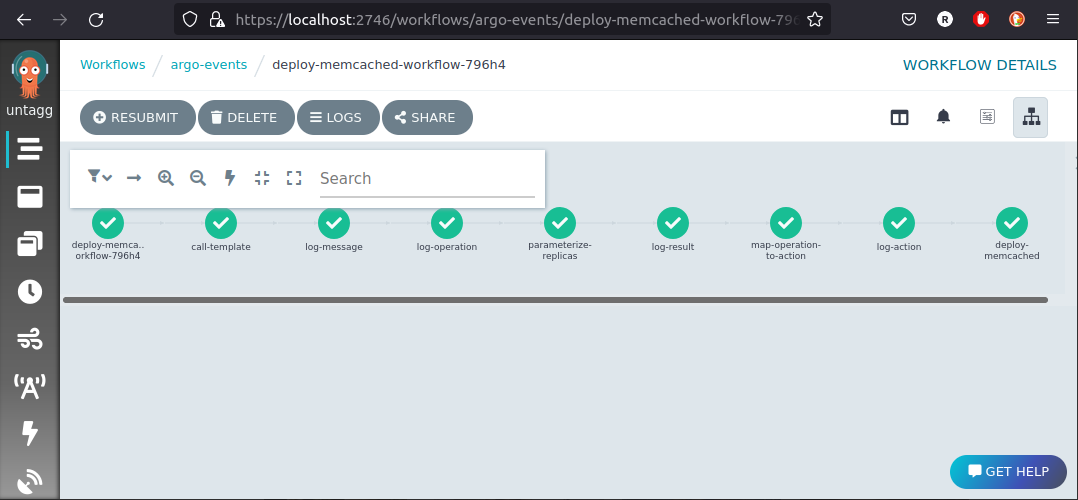
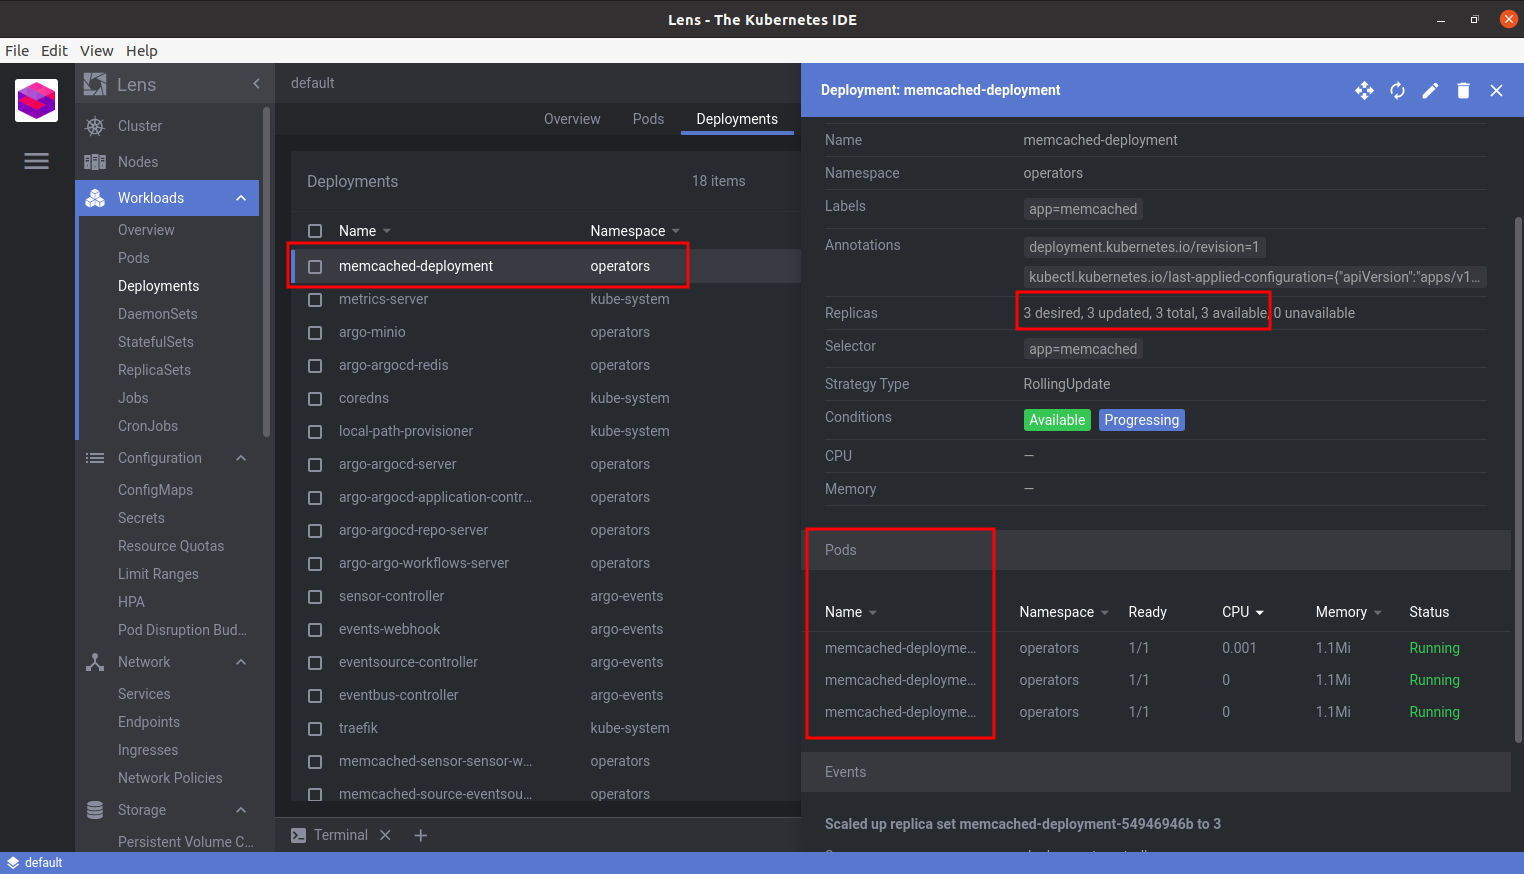
How can we tell it’s running?
And we can watch as our operator cleans it up again:
kubectl delete -n services -f https://raw.githubusercontent.com/reinvantveer/reinvantveer.github.io/master/_includes/memcached/memcached.yaml